The name of the bike; well I guess that's a give-away. When I ride this bike, it rains.
This bike is a 2000 V-Star 650 which I bought in 2003 with 10,000 kilometres on the clock. Over the next three years I put on only about another 2,000 kilometres a year but finally from around 2007 I've been able to get some time off and the occasional ride. Now with 44,000 kilometres and counting.

There is a story behind buying this bike. I was at a education evening at the then Metro Yamaha at Enoggera, Brisbane. Its now a Team Moto store, and still and excellent place to shop at. After the talks about oils etc, we had a browse through some of their motorcycle stock and this jet-black V-Star was just sitting there having just been traded in. I had a look and my friend Ritchie said, "I can just imagine you on that bad boy". I was already thinking about a road bike anyhow and thought, well, why not? and in about two weeks it was mine.
When I bought this bike I had no plans for travelling on it, that cam soon after. The original stock bike was never really designed for long distance riding and so I made a few changes. Some of these have worked and some have not.
June 2007 - Sheepskin seat cover from the local Skinny's Sheepskin Products Store.
I've tried a few things to make the seat more comfortable, including an Airhawk air cushion. The sheepskin on its own works OK. The wool raises me slightly but also allows me to move about a bit in the seat. It is important to wash it regularly with proper wool wash. Red is not a good colour though as it fades and when time comes to replace it, I'll go for a silver/grey colour perhaps.
2010 - Rjays Explorer Tail Pack.
I bought this online from MCAS and although may Rjays products are on the cheaper end of the scale they seem to work quite well and this tail pack is no exception. I do turn it around and sit it on the passenger seat and once strapped on works very well. In February 2012 I replaced the plastic loops with steel loops as this is where I strap the pack to the bike and one had broken. I've now sown loops with clips on the end that clip onto the top of the saddle bags. These loops started life as straps for laptop bags. Being in IT, I've got a few lying around. The side ears/pockets are very handy for storing things like water, earplugs, glasses etc. The pack has not yet fallen apart and so its fine by me.

June 2011 - National Cycles Street Shield EX Windscreen.
The National Cycles Street Shield EX is the largest aftermarket windscreen I could find as a reasonable price and I bought it mail order from MCAS. Its taken a lot of time to get exactly right.
August 2011 - Heated grips.
Ah Kemosobe, Tonto say if hands are warm, I am warm. The great Tonto is very wise and I did suffer mild hypothermia on one trip previously so I fitted a set of Kimpex grip heaters from Motorcycle Adventure Products. These work! Simple to install, you can put in a relay if you wish but they really do not draw enough power to warrant that. Only $49.95 plus postage. Its worth doing.
September 2011 - Headlight cut out switch.
A switch to stop the headlight drawing power, especially when starting would be a good idea. Apparently not legal in some states of Australia, so I definitely have not done this.
January 2012 - Airhawk air cushion.
The Airhawk is great. What I have learnt is that it helps to get the right size and shape to match your seat and therefore maximise the area in which the air can move about within. In my case, the best set-up is the Airhawk under the sheepskin. The total amount of extra height and cushioning seems to work quite well.

April 2012 - Saddlebags.
When I bought the bike, Metro Yamaha put on the Yamaha back seat and rest, rear rack and saddlebag supports and attached the smaller Willie and Max leather panniers/saddlebags. These are a well made pair of bags. Unfortunately they are a bit small for long distance travelling and so after they became a bit sad after a small accident I've replaced them with a pair of Dri-Rider Bikeman expandable twin bags. As at April 2012 I've yet to thoroughly test these so we will need to see how they go.

16 August 2012 - Exhaust and jetting.
When I bought the bike in 2003, it came with a pair of Cobra exhausts, which are OK. However I removed the side air filter as it make me ride with splayed legs and replaced it with a pair of K&N pod filters. The bike then ran too lean.
To resolve then lean mixture I moved up from the stock main jets of 90 to a pair of 115s and the bike ran well, increased performance during colder days and lower fuel consumption, getting up to 320 kilometres per tank, including using the reserve. However after the bike has a small crash, I replaced the windshield with the National Cycles Street Shield EX which is great but leaves me inside a quiet air bubble into which the Cobras boom. So for now I have gone back to a standard exhaust with some modifications to flow more easily. After a 100 km round trip today, the bike seems to run better and so let's see how the modifications go in terms of fuel consumption as well. I suspect that it is still a little too rich and I need to move the needle clamps up to the top or fit 105 jets.
By the way - it didn't rain today!
18 August 2012 - More jet nonsense.
Following on from refining the fuel/air mixture today I re-jetted the bike with 100 jets; 105 were not available. These are too small for the combination of K&N pod filters slightly modified exhausts. By the end of the day, I went back to the 115 jets but moved the needle clip from the first groove to the centre groove, number three. This involved numerous test rides and some frustration but it seems to be working well. The real test will be a long ride and checking the fuel consumption.
During the process I had to remove the stainless steel screws I put in last time as well as the mild steel screws the came stock with the bike. Knowing that I will want to play with this later and having one screw round off and needing an "Easy Out", I felt that there had to be a better way and replace the screws with my own invention. Here I used M4 stainless steel bolts with matching nuts to create a form of thumb screw. Each nut is tightened to the next, lock nut fashion and I also used permanent lock-tite. The alignment was tested by sliding a 7 mm socket over the nuts.


Remember that I travel with this bike and I like to have everything set up for reliability and serviceability and consider the advantages of these things:
1. Easy to loosen or tighten with 7 mm socket or spanner.
2. Can unscrew or screw to finger tight with, wait for it - fingers. That was a bit obvious.
3. If dropped, easy to find.
4. Won't round off.
5. I can see them in less than perfect light.
They work well and there is enough thread to go all the way through the carb body so I now there is plenty of thread contact. The original mild steel phillips head screws only had 8 mm of thread length at most. Let me take the opportunity to say "Shame on you Yamaha for making such great bikes but using such rubbish fasteners"; mind you, all Japanese bike manufacturers are probably guilty of this at one time or another.
Anyhow, changing jets or needle clip position should now be a breeze; I've done it often enough today.
Another thing I learnt today is just how helpful a magnetic parts tray is. I started using a Kinchrome one and it is excellent for someone who both drops and loses parts and fasteners.

I bought a single parts tray for each bike today to keep with their respective toolkits. If I ever need to do a roadside repair, they should save a great deal of drama.
19 August 2012 - Testing.
After all this work I rode the bike on the Grace to Goombungee route. Everything went went with 115 jets on needle groove #3. Perhaps it will be slightly smoother on groove #2 but groove #1 is definitely too rich for the standard exhausts, even with some slight modifications. Fuel consumption is back to better than 20 kilometres per litre and power is up. There was a slight resonance between 3900 and 4100 rpm but after putting a washer between the frame and the exhaust mounting points this was dramatically reduced.I'll put a second washer or some form of rubberised washer in the near future.
27 October 2012 - Goombungee Ride.
As you may have read on the main page, I rode up to Goombungee for the Kindy Association ride and then back again. Everything went well, including the jetting changes, especially when you get into higher elevation. When parking the bike at home though, I broke one of the clips on the saddlebags and so have replaced these with metal rings. I think that they main concern with software luggage is things like the various plastic clips etc and whilst I still prefer software luggage, my next bike ( eventually ) will have hard luggage and fuel injection. And yes, it did rain on the way home, a lot.
20 February 2013 - More jet nonsense.
After hours of constant running, I check the spark plugs and they are quite white. Accordingly I've moved the needle clips to position number 5; the richest setting possible. After about an hour of running, the bike seems to have even more power and smoother right throughout the rev range but particularly so in the 3900 to 4100 range.
25 February 2013 - New clutch and final drive.
This morning I learnt that not only was the clutch worn through normal wear and tear but also the final drive was completely trashed. The Yamaha V-Star 650 and 1100 models have a shaft drive and apparently the splines on the shaft need to be regularly re-lubricated. I actually only just read about this about four weeks ago on a Yamaha forum. My Yamaha service manual doesn't cover it and I believe that Yamaha released a circular/memo/email reminding dealers of the need to do this but I generally don't use a Yamaha dealer as the nearest from home is about 30 minutes drive away. At the time I read about it, I wasn't concerned as the forum post said that it normally gets done when you replace the tyres which is fine as I've replaced the tyres a few times. Anyhow, the Yamaha dealership was able to locate a second-hand unit and I'll get the final drive serviced every year. Probably I'll buy the Clymer manual for this bike and use that as well as the Yamaha manual to make sure that everything is done. By the way, the bike now has 52,000 kilometres on the clock.
21 March 2013 - Some small changes.
Since getting back from the shakedown trip, I've made a few small changes. The rear tail rack bag is gone and that space will now be used for a larger tent. I've created a packing list for travelling that includes less clothes and of the closted I take, most are synthetic material that packs down smaller, is lighter and dries faster. In fact I expect that the saddle-bags will not need to be expanded on future trips as my total luggage will weight at least 10 kilograms lighter than my last trip and that is also reflected in the amount of space used.
19 April 2013 - Handlebar end weights.
One of the problems when riding longer distance is vibration through the handlebars. On the little V-Star 650, Yamaha does not use handlebars that have a thread inside them and therefore you can not just add aftermarket bar end weights easily. You can install aftermarket handgrips that have matching end-weights but the cost is close to $250.00 and I was not confident of the outcome. So here was my attempt at something different. Uses 12m stainless steel threaded rod and stainless nuts. Inside the handlbars is another 12 mm stainless nylon lock nut and the handlebars are full of clear silicon. Test rode today and yesterday and works very well. I had everything in the shed from other jobs except two nuts and so total cost was about $3.00 as opposed to $250.00 for aftermarket grips and matching weights.


After last weekend's ride it was clear that some routine maintenance was now due. The sparks replaced and fresh oil, oil filter and O ring. The bike is about to tick over 70,000 kilometres and the records say that all this is due and so today's the day. I also took advantage of the time to chase some annoying rattles. After a visit to the Advanced Institute of the Interweb and the University of Youtube it became apparent that I needed to check around the headlight. Apparently this is a common problem. As a result I've added a few rubber grommets to the headlight adjusting screw and taped and bent the spring that holds it all together. A few tapes on the outer shell indicate that its making less noise so fingers crossed. I've also removed the fake valve covers as they are purely cosmetic and get in the way when changing plugs and chasing rattles. They may go back on, they may not. Their removal probably aids airflow up into the K&N pod filters and I will need a hot day to test that theory. Summer's coming, hopefully
Any ride of long distance requires the rider to consider all the little bits and pieces that add up to making the ride more enjoyable. That includes the weight and placement of luggage, including tools.
I carry a lot of tools and am always looking to refine the total number and types of tools, for the overall weight of the tools and where they fit. Over the last ten years there has been a growing awareness of the idea of mass centralization; making the weight as lower and as centered as possible. There has also been a plethora of different ideas on how to make carrying tools convenient. One example of this is the PVC down-pipe tool tube option, which I have done on the Suzuki and it works very well. That option cost me about $35.00 whereas other options of pre-manufactured tubes and boxes start at about $70.00 for one tube and go to about $200.00. In keeping with the utilitarian theme but also wanting to have some element of style, I looked at the document holder/tool tube option.
These document holders are readily available in the United States from most agricultural supply retail stores but I had been unable to find any on the shelves in Australia. Then one day after reading about someone else being ablt to source them from several stores about 40 minutes drive from home, I simply asked if they can be ordered in at the local John Deere tractor dealership. Yes, of course, no problem. $16.00 each plus any delivery charge. By the way, that's JPM Machinery in Caboolture (07 5495 1533).
The brackets I already had in my steel pile that I keep in the back of the shed and I did purchase new stainless steel bolts, washers and nuts, which came to about $8.00. In the name of looks, I did paint the tubes metallic charcoal with two coats of clear to finish it all off. This is the final product. Each of the two tubes fit the inner bags that hold the tools perfectly. Those bags I scored as leftovers from our business, so they are re-purposed and represent zero cost.
I guess they may act as some form of wind, rain and mud protection when riding in adverse conditions but I am not sure on that, we shall see. In terms of looks, being able to contain all the tools, keep them out of the saddlebags, mass centralization and nice, easy access to the tools, I think they will work well. If not, well then I have plenty of room to keep the thermos full of hot coffee.


This bike is a 2000 V-Star 650 which I bought in 2003 with 10,000 kilometres on the clock. Over the next three years I put on only about another 2,000 kilometres a year but finally from around 2007 I've been able to get some time off and the occasional ride. Now with 44,000 kilometres and counting.
 |
| Feb 2012. 10 kilometres west of Dorrigo, northern NSW, Australia whilst travelling to the Adventure Travel Film Festival. |

There is a story behind buying this bike. I was at a education evening at the then Metro Yamaha at Enoggera, Brisbane. Its now a Team Moto store, and still and excellent place to shop at. After the talks about oils etc, we had a browse through some of their motorcycle stock and this jet-black V-Star was just sitting there having just been traded in. I had a look and my friend Ritchie said, "I can just imagine you on that bad boy". I was already thinking about a road bike anyhow and thought, well, why not? and in about two weeks it was mine.
When I bought this bike I had no plans for travelling on it, that cam soon after. The original stock bike was never really designed for long distance riding and so I made a few changes. Some of these have worked and some have not.
June 2007 - Sheepskin seat cover from the local Skinny's Sheepskin Products Store.
I've tried a few things to make the seat more comfortable, including an Airhawk air cushion. The sheepskin on its own works OK. The wool raises me slightly but also allows me to move about a bit in the seat. It is important to wash it regularly with proper wool wash. Red is not a good colour though as it fades and when time comes to replace it, I'll go for a silver/grey colour perhaps.
2010 - Rjays Explorer Tail Pack.
I bought this online from MCAS and although may Rjays products are on the cheaper end of the scale they seem to work quite well and this tail pack is no exception. I do turn it around and sit it on the passenger seat and once strapped on works very well. In February 2012 I replaced the plastic loops with steel loops as this is where I strap the pack to the bike and one had broken. I've now sown loops with clips on the end that clip onto the top of the saddle bags. These loops started life as straps for laptop bags. Being in IT, I've got a few lying around. The side ears/pockets are very handy for storing things like water, earplugs, glasses etc. The pack has not yet fallen apart and so its fine by me.
June 2011 - National Cycles Street Shield EX Windscreen.
The National Cycles Street Shield EX is the largest aftermarket windscreen I could find as a reasonable price and I bought it mail order from MCAS. Its taken a lot of time to get exactly right.
August 2011 - Heated grips.
Ah Kemosobe, Tonto say if hands are warm, I am warm. The great Tonto is very wise and I did suffer mild hypothermia on one trip previously so I fitted a set of Kimpex grip heaters from Motorcycle Adventure Products. These work! Simple to install, you can put in a relay if you wish but they really do not draw enough power to warrant that. Only $49.95 plus postage. Its worth doing.
September 2011 - Headlight cut out switch.
A switch to stop the headlight drawing power, especially when starting would be a good idea. Apparently not legal in some states of Australia, so I definitely have not done this.
January 2012 - Airhawk air cushion.
The Airhawk is great. What I have learnt is that it helps to get the right size and shape to match your seat and therefore maximise the area in which the air can move about within. In my case, the best set-up is the Airhawk under the sheepskin. The total amount of extra height and cushioning seems to work quite well.
April 2012 - Saddlebags.
When I bought the bike, Metro Yamaha put on the Yamaha back seat and rest, rear rack and saddlebag supports and attached the smaller Willie and Max leather panniers/saddlebags. These are a well made pair of bags. Unfortunately they are a bit small for long distance travelling and so after they became a bit sad after a small accident I've replaced them with a pair of Dri-Rider Bikeman expandable twin bags. As at April 2012 I've yet to thoroughly test these so we will need to see how they go.
16 August 2012 - Exhaust and jetting.
When I bought the bike in 2003, it came with a pair of Cobra exhausts, which are OK. However I removed the side air filter as it make me ride with splayed legs and replaced it with a pair of K&N pod filters. The bike then ran too lean.
To resolve then lean mixture I moved up from the stock main jets of 90 to a pair of 115s and the bike ran well, increased performance during colder days and lower fuel consumption, getting up to 320 kilometres per tank, including using the reserve. However after the bike has a small crash, I replaced the windshield with the National Cycles Street Shield EX which is great but leaves me inside a quiet air bubble into which the Cobras boom. So for now I have gone back to a standard exhaust with some modifications to flow more easily. After a 100 km round trip today, the bike seems to run better and so let's see how the modifications go in terms of fuel consumption as well. I suspect that it is still a little too rich and I need to move the needle clamps up to the top or fit 105 jets.
By the way - it didn't rain today!
18 August 2012 - More jet nonsense.
Following on from refining the fuel/air mixture today I re-jetted the bike with 100 jets; 105 were not available. These are too small for the combination of K&N pod filters slightly modified exhausts. By the end of the day, I went back to the 115 jets but moved the needle clip from the first groove to the centre groove, number three. This involved numerous test rides and some frustration but it seems to be working well. The real test will be a long ride and checking the fuel consumption.
During the process I had to remove the stainless steel screws I put in last time as well as the mild steel screws the came stock with the bike. Knowing that I will want to play with this later and having one screw round off and needing an "Easy Out", I felt that there had to be a better way and replace the screws with my own invention. Here I used M4 stainless steel bolts with matching nuts to create a form of thumb screw. Each nut is tightened to the next, lock nut fashion and I also used permanent lock-tite. The alignment was tested by sliding a 7 mm socket over the nuts.


Remember that I travel with this bike and I like to have everything set up for reliability and serviceability and consider the advantages of these things:
1. Easy to loosen or tighten with 7 mm socket or spanner.
2. Can unscrew or screw to finger tight with, wait for it - fingers. That was a bit obvious.
3. If dropped, easy to find.
4. Won't round off.
5. I can see them in less than perfect light.
They work well and there is enough thread to go all the way through the carb body so I now there is plenty of thread contact. The original mild steel phillips head screws only had 8 mm of thread length at most. Let me take the opportunity to say "Shame on you Yamaha for making such great bikes but using such rubbish fasteners"; mind you, all Japanese bike manufacturers are probably guilty of this at one time or another.
Anyhow, changing jets or needle clip position should now be a breeze; I've done it often enough today.
Another thing I learnt today is just how helpful a magnetic parts tray is. I started using a Kinchrome one and it is excellent for someone who both drops and loses parts and fasteners.
I bought a single parts tray for each bike today to keep with their respective toolkits. If I ever need to do a roadside repair, they should save a great deal of drama.
19 August 2012 - Testing.
After all this work I rode the bike on the Grace to Goombungee route. Everything went went with 115 jets on needle groove #3. Perhaps it will be slightly smoother on groove #2 but groove #1 is definitely too rich for the standard exhausts, even with some slight modifications. Fuel consumption is back to better than 20 kilometres per litre and power is up. There was a slight resonance between 3900 and 4100 rpm but after putting a washer between the frame and the exhaust mounting points this was dramatically reduced.I'll put a second washer or some form of rubberised washer in the near future.
27 October 2012 - Goombungee Ride.
As you may have read on the main page, I rode up to Goombungee for the Kindy Association ride and then back again. Everything went well, including the jetting changes, especially when you get into higher elevation. When parking the bike at home though, I broke one of the clips on the saddlebags and so have replaced these with metal rings. I think that they main concern with software luggage is things like the various plastic clips etc and whilst I still prefer software luggage, my next bike ( eventually ) will have hard luggage and fuel injection. And yes, it did rain on the way home, a lot.
20 February 2013 - More jet nonsense.
After hours of constant running, I check the spark plugs and they are quite white. Accordingly I've moved the needle clips to position number 5; the richest setting possible. After about an hour of running, the bike seems to have even more power and smoother right throughout the rev range but particularly so in the 3900 to 4100 range.
25 February 2013 - New clutch and final drive.
This morning I learnt that not only was the clutch worn through normal wear and tear but also the final drive was completely trashed. The Yamaha V-Star 650 and 1100 models have a shaft drive and apparently the splines on the shaft need to be regularly re-lubricated. I actually only just read about this about four weeks ago on a Yamaha forum. My Yamaha service manual doesn't cover it and I believe that Yamaha released a circular/memo/email reminding dealers of the need to do this but I generally don't use a Yamaha dealer as the nearest from home is about 30 minutes drive away. At the time I read about it, I wasn't concerned as the forum post said that it normally gets done when you replace the tyres which is fine as I've replaced the tyres a few times. Anyhow, the Yamaha dealership was able to locate a second-hand unit and I'll get the final drive serviced every year. Probably I'll buy the Clymer manual for this bike and use that as well as the Yamaha manual to make sure that everything is done. By the way, the bike now has 52,000 kilometres on the clock.
21 March 2013 - Some small changes.
Since getting back from the shakedown trip, I've made a few small changes. The rear tail rack bag is gone and that space will now be used for a larger tent. I've created a packing list for travelling that includes less clothes and of the closted I take, most are synthetic material that packs down smaller, is lighter and dries faster. In fact I expect that the saddle-bags will not need to be expanded on future trips as my total luggage will weight at least 10 kilograms lighter than my last trip and that is also reflected in the amount of space used.
19 April 2013 - Handlebar end weights.
One of the problems when riding longer distance is vibration through the handlebars. On the little V-Star 650, Yamaha does not use handlebars that have a thread inside them and therefore you can not just add aftermarket bar end weights easily. You can install aftermarket handgrips that have matching end-weights but the cost is close to $250.00 and I was not confident of the outcome. So here was my attempt at something different. Uses 12m stainless steel threaded rod and stainless nuts. Inside the handlbars is another 12 mm stainless nylon lock nut and the handlebars are full of clear silicon. Test rode today and yesterday and works very well. I had everything in the shed from other jobs except two nuts and so total cost was about $3.00 as opposed to $250.00 for aftermarket grips and matching weights.


Monday 4 August 2014. Oil leaks, just like a real Harley.
Sorry, I know that modern Harleys aren't what they used to be and the oil leak jokes are getting old but I couldn't resist. Anyhow on the last few rides the bike has left a few sad tears of oil behind. I let this go for a while until I had a chance to do some Internet searches and found that it really isn't a big deal. The neutral switch is plastic and becomes brittle. The replacement part is cheap and the job very simple. So I've replaced it as well as the O ring for the valve cover as that also looked suspect and its is easy to do at the same time. Job's done and I have yet to test it but it is looking good.
Thursday 14 August 2014. Fresh oil and solving some rattles.
Sunday 29 November 2015. Replacement pickup coil and CDI/Ignitor unit.
Over the last few days I have been putting the V-Star back together. This has come about as it has been sitting idle for a few months whilst I replaced the CDI unit (also named by Yamaha as the "Ignitor Unit") and the pick-up coil. The stock parts from Yamaha are very expensive at $1,000.00 for the CDI unit and $275.00 for the pick-up coil. So a search for aftermarket replacements found theDyna3000 unit from Dynatek available from Northstar Yamaha for less than $400.00. A few searches and emails found an aftermarket pickup coil from Rick's Motorsport Electrics available from2 Wheel Wholesale in New Zealand for around $100.00 Australian Dollars.
By the way, if anyone out there is looking to do the same for a V-Star 650, I can confirm that the blue wire with a yellow chaser strip on the pickup coil connects to the standard black wire. The green wire on the pickup coil goes to the standard grey wire.
By the way, if anyone out there is looking to do the same for a V-Star 650, I can confirm that the blue wire with a yellow chaser strip on the pickup coil connects to the standard black wire. The green wire on the pickup coil goes to the standard grey wire.
The bike goes very well know and I am expecting improved performance, economy and running more smoothly. The Dyna3000 comes with eight ignition curves. One and two are close to stock with three and four have greater advance to take advantage of non-stock intake and exhaust. I have it currently on ignition curve three to set a baseline but will switch to four to try to see what sort of difference it will make. Hopefully and even further increase in performance will be available.
Thursday 12 May 2016. Tool tubes on engine protection bars.
I carry a lot of tools and am always looking to refine the total number and types of tools, for the overall weight of the tools and where they fit. Over the last ten years there has been a growing awareness of the idea of mass centralization; making the weight as lower and as centered as possible. There has also been a plethora of different ideas on how to make carrying tools convenient. One example of this is the PVC down-pipe tool tube option, which I have done on the Suzuki and it works very well. That option cost me about $35.00 whereas other options of pre-manufactured tubes and boxes start at about $70.00 for one tube and go to about $200.00. In keeping with the utilitarian theme but also wanting to have some element of style, I looked at the document holder/tool tube option.
These document holders are readily available in the United States from most agricultural supply retail stores but I had been unable to find any on the shelves in Australia. Then one day after reading about someone else being ablt to source them from several stores about 40 minutes drive from home, I simply asked if they can be ordered in at the local John Deere tractor dealership. Yes, of course, no problem. $16.00 each plus any delivery charge. By the way, that's JPM Machinery in Caboolture (07 5495 1533).
The brackets I already had in my steel pile that I keep in the back of the shed and I did purchase new stainless steel bolts, washers and nuts, which came to about $8.00. In the name of looks, I did paint the tubes metallic charcoal with two coats of clear to finish it all off. This is the final product. Each of the two tubes fit the inner bags that hold the tools perfectly. Those bags I scored as leftovers from our business, so they are re-purposed and represent zero cost.
I guess they may act as some form of wind, rain and mud protection when riding in adverse conditions but I am not sure on that, we shall see. In terms of looks, being able to contain all the tools, keep them out of the saddlebags, mass centralization and nice, easy access to the tools, I think they will work well. If not, well then I have plenty of room to keep the thermos full of hot coffee.


December 2017. Adjust rear shock preload.
After a trip earlier in the year, Mark K commented on how much the rear of the bike moved through some twisty terrain. Mark's comments reflected my own thoughts and so I spent a few weeks and short ride experimenting with the rear pre-load. The shocks on these bikes are fairly primitive, with seven set settings. They are changed by moving a ring on the shock with a C-spanner. The C Spanner that comes with the standard Yamaha kit is designed for both this job as well as the steering head bearings (as per the picture below) However I find that using a large pair of multi grips much easier. There is no rebound adjustment on these shocks.

To adjust the preload involves removing the drivers seat and therefore depending on how the bike is set up, that may also involve removing saddlebags and the passenger seat as well. It is very important to have the bike jacked up, with the rear wheel off the floor/ground. If you do not do this, the pressure on the ring makes it impossible to move.
Anyhow, whilst I can not recall what number setting it was on before, I tried both number six and number five for a few weeks each. Number six was definitely too hard and number five seems to be just right at this stage. As a reminder to myself, the too dots or dimples, slightly to the left of centre, are the reference marks on the shock. Another reminder to myself is to purchase another set of multigrip pliers, about twice the size of my current set and with a nice curve. That will make this job much easier.
I noticed the ride improvement straight away, the bike hardly "wallows" in the rear and I do not get a sore rear end after only a few hours riding, so at this stage, a big win.
January 2017. Replace front fork oil.
There is an old saying amongst those that know, that fixing one end of a motorcycle's suspension highlights the problem at the other end. This was the case with the V-Star and the front end's shortcomings were made so much clearer once the pre-load on the rear end was set to number five setting. So to resolve this I replaced the fork oil in the front forks. This involved:
1. Remove the front forks from the bike and remove the top caps, washer and springs. Drain all old oil and clean.
2. Replace the oil. Old fork oil is too fluid and has a reduced damping effect. Taking advantage of this change I also increase the fork oil weight from the standard 10 weight to 12.5, this increases damping but not rebound. Increased the volume of oil from stock of 507 to 515 ml, thereby reducing the air left inside the forks; this increases the rebound.
3. Went for a test ride. Much more predictable and confidence inspiring.
An interesting thing worthy of note is a change in procedure to complete this task. There are two ways of measuring the amount of oil and size of the air gap/air spring. One is to measure the amount of space without oil from the top of the fork to the oil level with the fork spring removed and the stanchion compressed. This method is often used in workshops where time is money and there is sometimes not enough time to ensure that every last drop of old oil is removed. As I did have time and could leave the complete fork hanging upside down overnight to drain, I used the other method of exactly measuring the amount of new oil going in. Due to this, I was able to leave the fork completely in one piece and taped the upper fork legs open/up, this avoiding any messy spills etc.
I will probably go to a 15 weight oil next time, which will be either Christmas 2017 or Christmas 2018 but at this stage, the bike is the most comfortable to ride as I can remember.
April 2017. Upside down triangle duct in windshield.
Currently I am running a National Cycles Street Ex windshield. It came in a light grey with a 26% tint. At the time I think that to get a clear screen you needed to select a different model, I'm not sure. Anyhow, it is a big screen and protects me well from bugs of an evening. However they way it was sitting could be better for reducing wind noise and buffeting. On the Suzuki I had done the upside down triangle cut in the windshield and it made a noticeable difference, so I thought why not try it? The worst thing I could do is trash a $200.00 windshield! Well actually, that last part made me a bit nervous. Anyhow, I gave it a go and it really made a difference in reducing wind noise and buffeting. Here are the steps I would recommend if you would like to try:
Step One: Search as much information on the best way to measure and cut the windshield. There are a lot of different opinions on this, so be careful to weigh up all the options. Remember slow and steady.
Step Two: When you are ready, tape up with either masking tape or duct tape the screen. This is to avoid scratches from accidentally dragging a tool across the surface.
Step Three: Measure twice, cut once. I used the masking tape to help me identify and mark cut lines.
Step Four: Drill out the corners.
Step Five: Cut the lines between the corner circles. In this case I used a 32 tooth hacksaw blade but on the Suzuki I used a rotary tool. Both are fine but the rotary tool was faster, I just couldn't find the right cutting disk.
Step Six: File and sand, file and sand, file and sand. Again, you want a smooth radius on the cut lines.
Step Seven: Refit the screen and test. I found that the initial setup worked well but thought it could be better. After an hour's ride, I increased the angle of the windshield and raised the bottom slightly.

Very happy after that. I can hear the MP3 player at 100 kilometres per hour OK if I choose to. I still wear ear plugs whilst riding and together, the entire setup is much more comfortable to ride.
As an aside, I was asked about this modification a few times, it does look a little strange. Anyhow, my answer has three parts, at this stage:
It works because it reduces the amount of area pushing wind up and over to the actual area you need, not the entire surface area.
It also prevents the vacuum or negative pressure behind the windshield.
I have noticed that the last ten years all motorcycle manufacturers putting vents in the windshields or spacer between the windshield and the bodywork, so I am certain there is some real science behind it all. Of course, there would be a lot of science into the size and shape of the vents which I don't have access to, so I do need to have luck on my side too. In this case, it was. Here is some of teh science explained at California Scientific, I don't understand it all, by the way. Here are a couple of other links on the idea:
http://advrider.com/index.php?threads/does-cutting-a-vent-hole-in-the-base-of-a-windscreen-really-cut-wind-noise.707059/
http://advrider.com/index.php?threads/naca-ducts-and-the-gsa-screen-aerodynamicists-opinion-sought.632575/
Based on the success so far, I would recommend to people who have the money to try a kit that makes everything look proper like this:
http://rifle.com/Motorcycle-Windshields/Accessories/Air-Balance-Windshield-Vent-Kit.aspx
May 2017. New Handguard design.
The DIY handguard have proven to be really worthwhile, however they were always just there to prove the concept, especially the mounting and keeping the wind of my hands and forearms. So today I built some new ones which have a slightly larger surface area, a top and bottom bent edge that keeps them even straighter and a NAPA vent to ensure that the air behind the acrylic starys fairly smooth without a vacuum and turbulence. Yet to be tested but I am fairly confident that the design will work well and make the ride even more enjoyable.


May 2017. Repair the heated handgrips, at the right price.
At our last family ride, the heated handgrips on the throttle failed, even causing a short that drained the battery. That problem and the concern I now have about the effect of constant vibration had got me thinking. I started looking at aftermarket grips and was looking at a cost of between $100.00 and $200.00 dollars, which is not the right price. Just as much a worry was how to get the right set to include heating or to integrate a heater solution from another vendor. So I took apart the handgrip and the heater element and started to see what can be done:
First, identify the obvious problem. One of the wires har come away from the solder pad. Remember that this set of heaters was only about $35.00 new and bout in about 2005, 12 years ago, so I can't complain at all.

Next, check to see if the heating element is still intact. By using a multimeter I was able to confirm that there was a small amount of resistance, so I was confident that a repair was possible.

Solder on replacement wires. Note the staggered lengths to ensure that the joins would be a different spots. After the new wires were soldered on, I double checked the resistance.

Confident that the heater element is now working I re-attached it to the throttle tube. Normally I would use black insulating tape but went with white as I felt it would show up in the photos better. An extra layer near the joins to help avoid shorts in the future. There is plenty of glue on the inside of the heater element.

Some people may disagree with this but I also do a run of tape over the grips. This works well on the Suzuki and keeps everything tight.


Now here comes the interesting bit and a nit of additional cost saving. When I replaced the left-hand grip on the Suzuki, I bought a pair of 'Grip Puppies'. There was nothing wrong with the throttle side and so I left that as is, leaving me with a spare Grip Puppy. These are software than the stock rubber when it is new, let alone after 17 years. So I thought, why not give that a go.

And so I did. Worked just fine. Of course, I will need to do the other side to match and possibly change these every year or so, as the Grip Puppies do wear. However they also do absorb a lot of vibration.

As of time of writing total cost is the right price ... $0.00 . I will order a pair of Grip Puppies so that I can replace the rubber on the left hand side but for now, the bike is ready to go. When the new Grip Puppies come in, total cost will come to about $35.00, This is a lot less than the $100.00 to $200.00 I was looking at as well as the secure knowledge that this solution works.
April 2017. Upside down triangle duct in windshield.
Currently I am running a National Cycles Street Ex windshield. It came in a light grey with a 26% tint. At the time I think that to get a clear screen you needed to select a different model, I'm not sure. Anyhow, it is a big screen and protects me well from bugs of an evening. However they way it was sitting could be better for reducing wind noise and buffeting. On the Suzuki I had done the upside down triangle cut in the windshield and it made a noticeable difference, so I thought why not try it? The worst thing I could do is trash a $200.00 windshield! Well actually, that last part made me a bit nervous. Anyhow, I gave it a go and it really made a difference in reducing wind noise and buffeting. Here are the steps I would recommend if you would like to try:
Step One: Search as much information on the best way to measure and cut the windshield. There are a lot of different opinions on this, so be careful to weigh up all the options. Remember slow and steady.
Step Two: When you are ready, tape up with either masking tape or duct tape the screen. This is to avoid scratches from accidentally dragging a tool across the surface.
Step Three: Measure twice, cut once. I used the masking tape to help me identify and mark cut lines.
Step Four: Drill out the corners.
- Remove the screen from the bike so that you can support it properly.
- Be sure to support behind the screen, drilling down into the concave side of the screen. This avoids undue pressure on the screen.
- Start with a small pilot hole and then use a step drill to complete the three corners. A step drill grinds out the material rather than cuts it and thus helps to avoid cracking. A smooth radius corner and edge is really important to avoid cracking too.
Step Five: Cut the lines between the corner circles. In this case I used a 32 tooth hacksaw blade but on the Suzuki I used a rotary tool. Both are fine but the rotary tool was faster, I just couldn't find the right cutting disk.
Step Six: File and sand, file and sand, file and sand. Again, you want a smooth radius on the cut lines.
Step Seven: Refit the screen and test. I found that the initial setup worked well but thought it could be better. After an hour's ride, I increased the angle of the windshield and raised the bottom slightly.

Very happy after that. I can hear the MP3 player at 100 kilometres per hour OK if I choose to. I still wear ear plugs whilst riding and together, the entire setup is much more comfortable to ride.
As an aside, I was asked about this modification a few times, it does look a little strange. Anyhow, my answer has three parts, at this stage:
It works because it reduces the amount of area pushing wind up and over to the actual area you need, not the entire surface area.
It also prevents the vacuum or negative pressure behind the windshield.
I have noticed that the last ten years all motorcycle manufacturers putting vents in the windshields or spacer between the windshield and the bodywork, so I am certain there is some real science behind it all. Of course, there would be a lot of science into the size and shape of the vents which I don't have access to, so I do need to have luck on my side too. In this case, it was. Here is some of teh science explained at California Scientific, I don't understand it all, by the way. Here are a couple of other links on the idea:
http://advrider.com/index.php?threads/does-cutting-a-vent-hole-in-the-base-of-a-windscreen-really-cut-wind-noise.707059/
http://advrider.com/index.php?threads/naca-ducts-and-the-gsa-screen-aerodynamicists-opinion-sought.632575/
Based on the success so far, I would recommend to people who have the money to try a kit that makes everything look proper like this:
http://rifle.com/Motorcycle-Windshields/Accessories/Air-Balance-Windshield-Vent-Kit.aspx
May 2017. New Handguard design.
The DIY handguard have proven to be really worthwhile, however they were always just there to prove the concept, especially the mounting and keeping the wind of my hands and forearms. So today I built some new ones which have a slightly larger surface area, a top and bottom bent edge that keeps them even straighter and a NAPA vent to ensure that the air behind the acrylic starys fairly smooth without a vacuum and turbulence. Yet to be tested but I am fairly confident that the design will work well and make the ride even more enjoyable.


May 2017. Repair the heated handgrips, at the right price.
At our last family ride, the heated handgrips on the throttle failed, even causing a short that drained the battery. That problem and the concern I now have about the effect of constant vibration had got me thinking. I started looking at aftermarket grips and was looking at a cost of between $100.00 and $200.00 dollars, which is not the right price. Just as much a worry was how to get the right set to include heating or to integrate a heater solution from another vendor. So I took apart the handgrip and the heater element and started to see what can be done:
First, identify the obvious problem. One of the wires har come away from the solder pad. Remember that this set of heaters was only about $35.00 new and bout in about 2005, 12 years ago, so I can't complain at all.

Next, check to see if the heating element is still intact. By using a multimeter I was able to confirm that there was a small amount of resistance, so I was confident that a repair was possible.

Solder on replacement wires. Note the staggered lengths to ensure that the joins would be a different spots. After the new wires were soldered on, I double checked the resistance.

Confident that the heater element is now working I re-attached it to the throttle tube. Normally I would use black insulating tape but went with white as I felt it would show up in the photos better. An extra layer near the joins to help avoid shorts in the future. There is plenty of glue on the inside of the heater element.

Some people may disagree with this but I also do a run of tape over the grips. This works well on the Suzuki and keeps everything tight.


Now here comes the interesting bit and a nit of additional cost saving. When I replaced the left-hand grip on the Suzuki, I bought a pair of 'Grip Puppies'. There was nothing wrong with the throttle side and so I left that as is, leaving me with a spare Grip Puppy. These are software than the stock rubber when it is new, let alone after 17 years. So I thought, why not give that a go.

And so I did. Worked just fine. Of course, I will need to do the other side to match and possibly change these every year or so, as the Grip Puppies do wear. However they also do absorb a lot of vibration.

As of time of writing total cost is the right price ... $0.00 . I will order a pair of Grip Puppies so that I can replace the rubber on the left hand side but for now, the bike is ready to go. When the new Grip Puppies come in, total cost will come to about $35.00, This is a lot less than the $100.00 to $200.00 I was looking at as well as the secure knowledge that this solution works.
June 2017. Time to start thinking about the rear tailbag.
As you know, after I bought the bike, I put on a RJays Explorer tailbag. It has worked OK but it hasn't been perfect either. In the intervening six years, I have developed a bit of an understanding in the sort of tail bag that should work well when going on trips. For around town by myself, the current helmet bag from Naz Bags is perfect. For touring or two-up though, I wouldn't mind a bit more space to store at least one helmet, possible two whilst still being fairly neat. Here is what I am thinking of at the moment:
Really good to have:
Good to have:
Looks really good and can use it when travelling by planes, trains and automobiles.
Maybe, maybe not.
Possible Contenders so far, but I am open to ideas:
As you know, after I bought the bike, I put on a RJays Explorer tailbag. It has worked OK but it hasn't been perfect either. In the intervening six years, I have developed a bit of an understanding in the sort of tail bag that should work well when going on trips. For around town by myself, the current helmet bag from Naz Bags is perfect. For touring or two-up though, I wouldn't mind a bit more space to store at least one helmet, possible two whilst still being fairly neat. Here is what I am thinking of at the moment:
Really good to have:
- Heavy duty reinforced material. 1680 denier or lighter but with some form of backing perhaps.
- Side pockets. I prefer non-adjustable as the zippers may fail and I don't need the space as I would use these for small things such as notebook, glasses, earplugs etc.
- Multiple adjustable seat/carrier mount and sissy bar rack mounts. I found that with one brand, the non adjustable sissy bar mounts an absolute pain. Security strap so the bag can’t slide off the bar.
- Good carry handle. Preferably centered. The one I have used for many years has it hande on the side and is clumsy to carry.
- Internal pockets that are easy to use to keep things organised.
- Proper method of keeping shape, especially the bottom. I find sagging bags very unappealing.
- Large enough to carry helmet, summer jacket and gloves without expanding. I guess that is a minimum of 30 cm x 30 cm x 40 cm, perhaps 36 litre capacity, but I need to experiment with this a bit to be sure.
Good to have:
Looks really good and can use it when travelling by planes, trains and automobiles.
Maybe, maybe not.
- Front/rear pocket, whatever side is opposite the sissy bar.
- Reflective patches.
- Clip on shoulder carry strap.
- Built in waterproof rain/storm cover. Usually I pack stuff in either waterproof bags or carry stuff that doesn't matter if it gets a little wet. In Queensland downpours, you usually don't get time to pull over and pull out the rain cover. I guess if it is easily and quickly accessible without undoing a bunch of straps, then that's OK.
- Seat mount straps (and bike side panel protectors). I use other luggage on the seat sometimes and of course, the point of this is to make the bike pillion friendly.
- Possibly large enough to store two helmets, not sure on this. If it is OK for one helmet without expansion and can fit two with expansion, I would see how neat this all worked together.
Possible Contenders so far, but I am open to ideas:
- Motodry ZXR-1 Rollbag.This is readily available at quite a few places and so when I am ready, I can have a good look.
- SHAD SB70 Soft Tail Pack Motorcycle Bag X0SB70. I am not sure if this is available in Australia.
- Motodry Black cruiser trail rear bag.This is also readily available at quite a few places.
A few weeks ago I had a flat tyre on the rear wheel. A bit frustrating but no matter, a chance to try a few things. I suspected that bot only was the tube pierced where a screw had gone in but also has split near the valve. I attempted to replace the tube myself but lacked confidence in breaking the tyre bead away from the rim. So after removal, I took the wheel and spare tube to Tyres for Bikes at Albion, who fixed it all straightaway.
This flat tyre gave me a chance to find out a few things. First, it avtually doesn't take much to take the rear wheel off or to re-install it. Here are all the tools you need:

Of course, a lift is a big help. There are other ways to raise the bike, but as of today, these are now less than $200.00 at most auto stores in Australia.
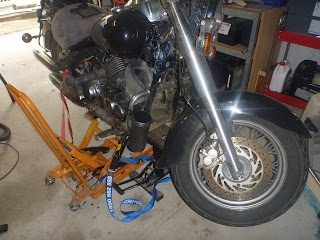
The other thing I learnt is that some of the instant aerosol flat repair products actually do work. They can leave the tube a mess but will get you home. So I now carry a can of the Motul product with me. This puts to rest a worry I have always had nagging me about what to do if I get a flat whilst travelling. The Motul can will always get me to a town where I can have a bike shop replace a tube.
No comments:
Post a Comment
Thanks for taking the time to read my blog. I'll be sure to read your comments as well.
Thanks,
Shane